


The Garmin Edge 520 is the latest and most advanced GPS cycling computer in the Garmin Edge range. Released last year the Edge 520 followed on from the successful Edge 500 then Edge 510 in the Garmin 5xx series line. The Garmin Edge 520 has some impressive new features, a refreshed look and a new user friendly interface.
You can click through to any section of the review from these links.
Unboxing the Edge 520
Getting Started
Riding with the Edge 520
Maps for the Edge 520
Strava Live Segments
Ant+ Trainer Control
Garmin Connect IQ Data Fields
Edge 520 Features
Review Summary
Buy an Edge 520
Unboxing the Garmin Edge 520
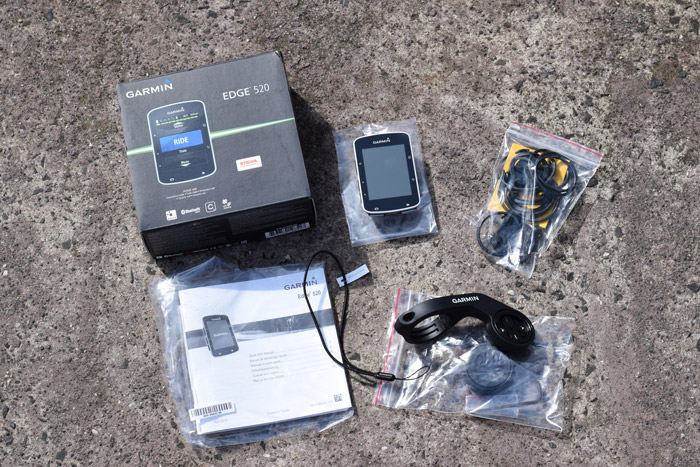
It depends on the bundle you buy as to what’s in the box, I bought the device only package as I use another brand heart rate strap and had existing cadence and speed sensors on my bike. The device only box contained the head unit, a USB cable, a Garmin branded out front mount and reducers depending on your handlebar diameter, a stem mount plus an assortment of rubber rings of different sizes to retain the stem mount. Also in the box were instruction manuals and a tether.
For those that choose to buy the Garmin Edge 520 bundle you will get all the same items plus a Garmin premium heart rate strap, cadence sensor and speed sensor.
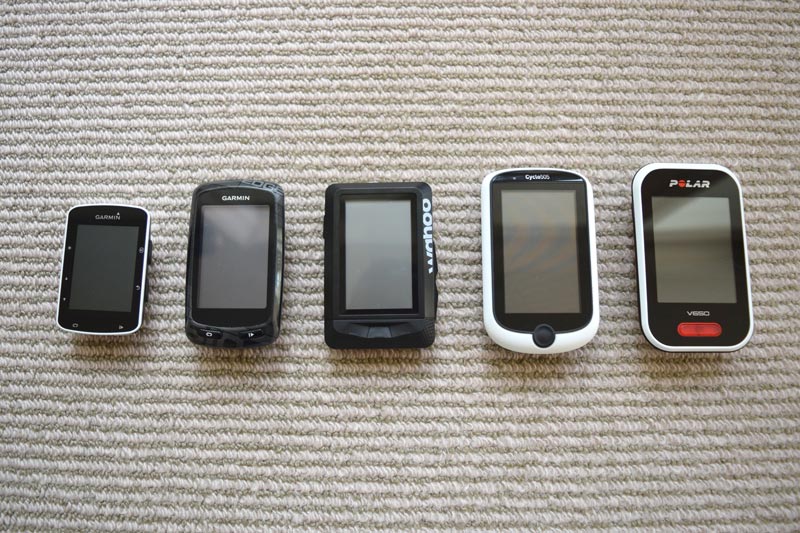
In terms of size the Edge 520 is significantly smaller than most of the more advanced GPS cycling computers on the market today, below is a comparison to a Garmin Edge 810, Wahoo Elemnt, Cyclo 505 and Polar V650. The Polar is the same size as a Garmin Edge 1000. The Garmin Edge 520 is smaller than the Edge 510 but the screen area is larger.
Getting started with the Edge 520
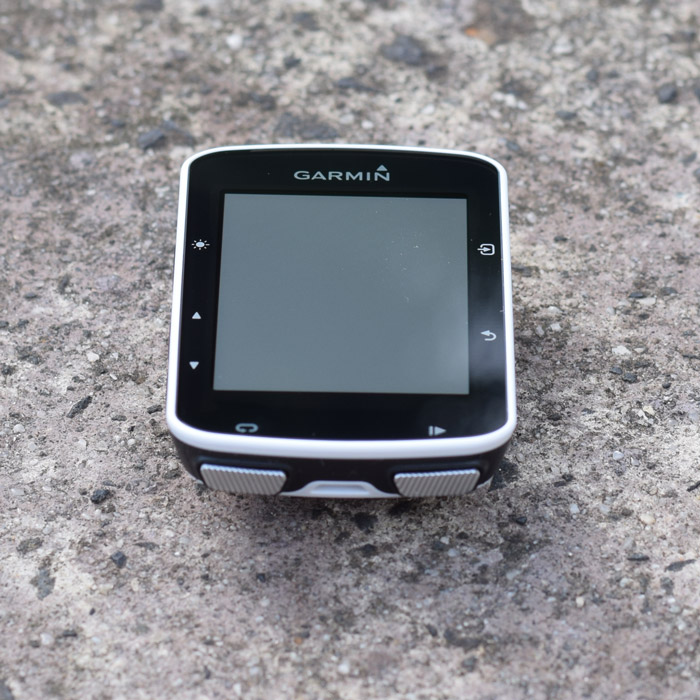
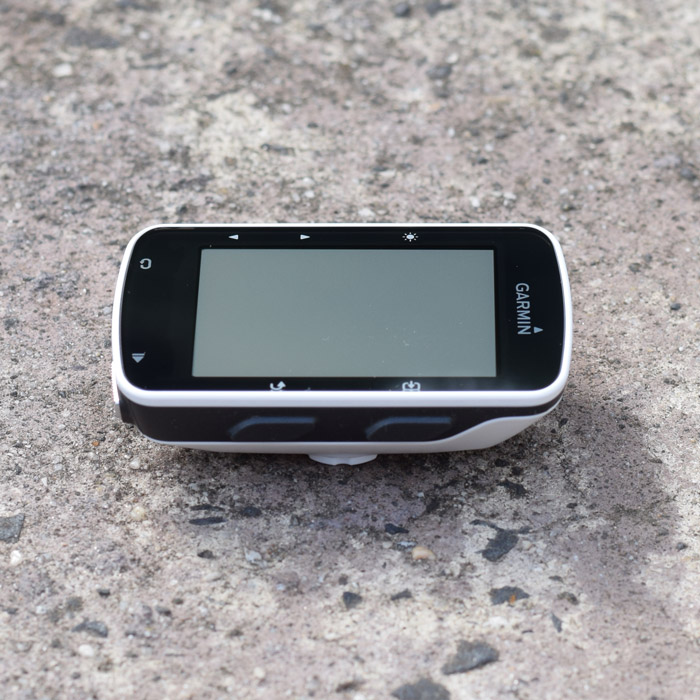
After removing the head unit from the box and switching the unit on two things are immediately obvious, there are more buttons and different layout to the previous Edge 500 and Edge 510, and there is no touch screen but more on that later.
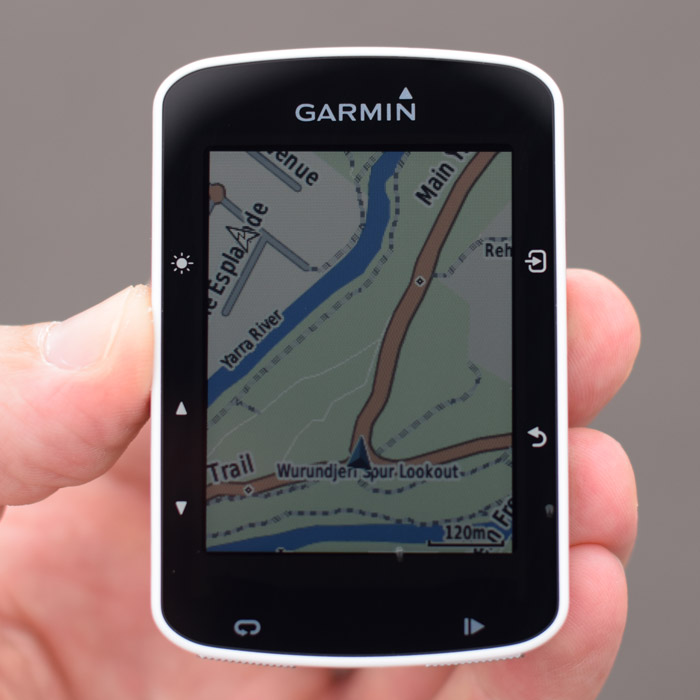
The button layout is summarized below and I will refer to the buttons by these names for the rest of the review:
| Left Top | Light and Power button | Right Upper | Select button (for menus) | |
|---|---|---|---|---|
| Left Middle | Up selection button | Right Lower | ‘Back’ button (for menus) | |
| Left Lower | Down selection button | |||
| Bottom Left | Lap button | Bottom Right | Start / Stop button | |
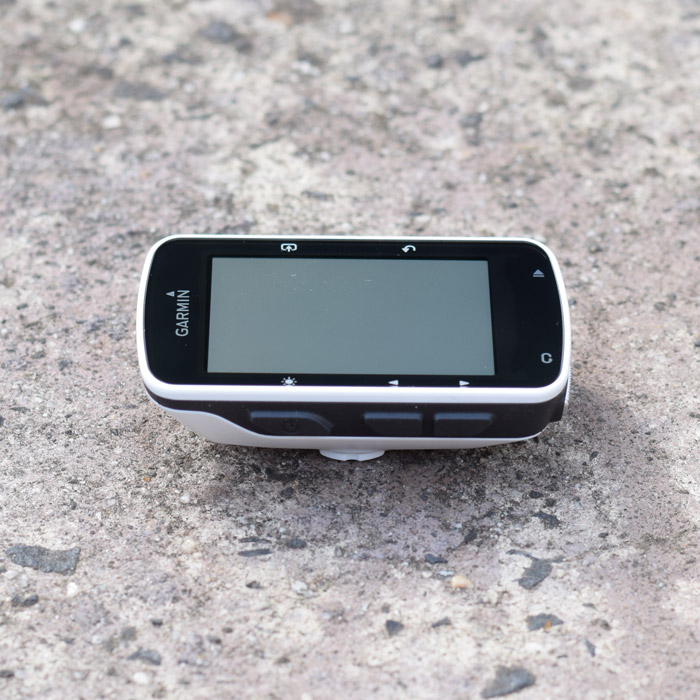
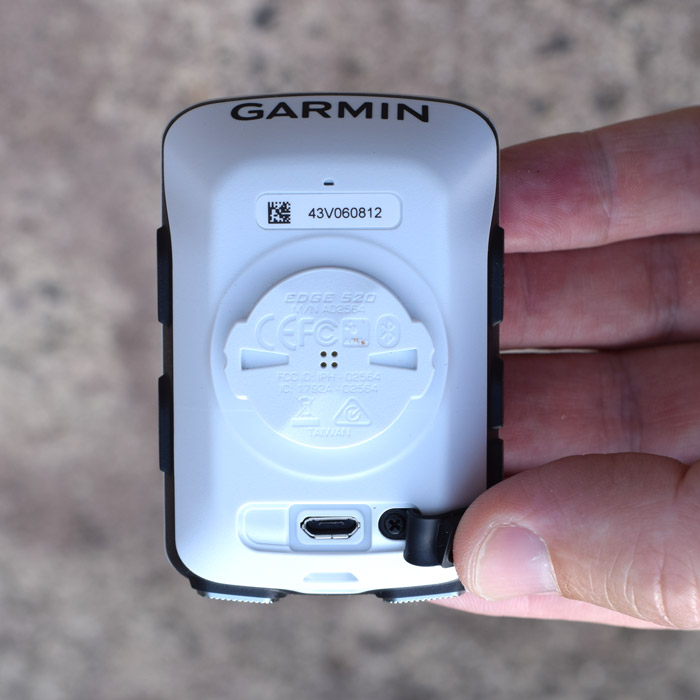
Here’s some pictures showing the buttons and the USB charging port on the bottom of the Edge 520.
Setting up the Garmin Edge 520 is user friendly and intuitive, there’s no real need to grab the manual, just switch on and start pressing buttons. The next section is how I set it up to get ready for the first ride.
Error, group does not exist! Check your syntax! (ID: 9)Press the Left Top button to turn the Garmin on and you will get a similar splash opening page to all other Garmin’s and then you will go in to the set up menus. To get back to any of these settings later just use the Left Lower button to scroll to settings, then into the function you need to change.
Language: use the Left Middle and Left Lower buttons to scroll through menu options to select the language you want and then confirm by pressing the Right Upper button.
Units Format: either select Metric, Statute or Statute UK using the same three buttons as above.
Time Format: select either 12 or 24 hour.
Gender: select either Male or Female.
Birth Year: select your birth year.
Weight: enter your weight in either kg or statute.
Height: same as above, enter your height in either cm or ft inches.
Cycling Ability: the next one asks you to determine your cycling ability, options are Untrained, Fair, Good, Excellent or Superior.
At this point you will be asked to connect sensors so select Yes and then wake up the sensors on your bike by spinning the crank and rear wheel if you have a speed sensor or cadence sensor or powermeter.
Once all sensors are detected it will list them on screen with their ID number, wait until they are all found, it could take 10-20 seconds for all to be found the first time.
Connect Bluetooth: The Garmin Edge 520 doesn’t support Bluetooth Smart sensors but it does support text and call notifications, Garmin LiveTrack and ride uploads via Bluetooth Smart when used with the Garmin Connect app on your phone.
Simply select Bluetooth from the Edge 520 Settings menu, scroll down to Bluetooth and with your smartphone handy work through the prompts on both to set up. You will get a confirmation and be able to see your Garmin Edge 520 set up within your smartphones Bluetooth menu. Likewise you will see your smartphone paired in the Edge 520 menu.
You will need to have the Garmin Connect app on your iPhone or Android phone before or during this step, simply download from iTunes or Google Play and then login with an active Garmin account.
When you use the Garmin Edge 520 paired with your phone and the Garmin Connect app your rides will update to Garmin Connect and any third party platforms like Strava within seconds of finishing your ride.
Set Up Activity Profiles: There are three standard default profiles, Train, Indoor and Race. Selecting Yes will take you to the page with the three profiles plus an option to Create New profile. You can add or change now or later as per below.
To customise a profile anytime I found the easiest way was hit enter (Right Upper button) three times from the home page, you end up on the menu page where you can scroll down to select Data Fields. Press the Right Upper right button and then you can go through and select your layout preferences and field options.
To add a profile later press the Left Lower button, then scroll to select Settings, then Activity Profiles and you can then Create New or modify one of the existing profiles.
Indoor Profile One other thing you will want to do for indoor trainer use or if you use a speed sensor on the road instead of GPS for speed is set your wheel size. These are the options I used to get change the wheel size:
> select Settings > select Sensors > select speed sensor > select Sensor Details > select Wheel Size > select Manual > Enter in wheel size
Riding with the Edge 520
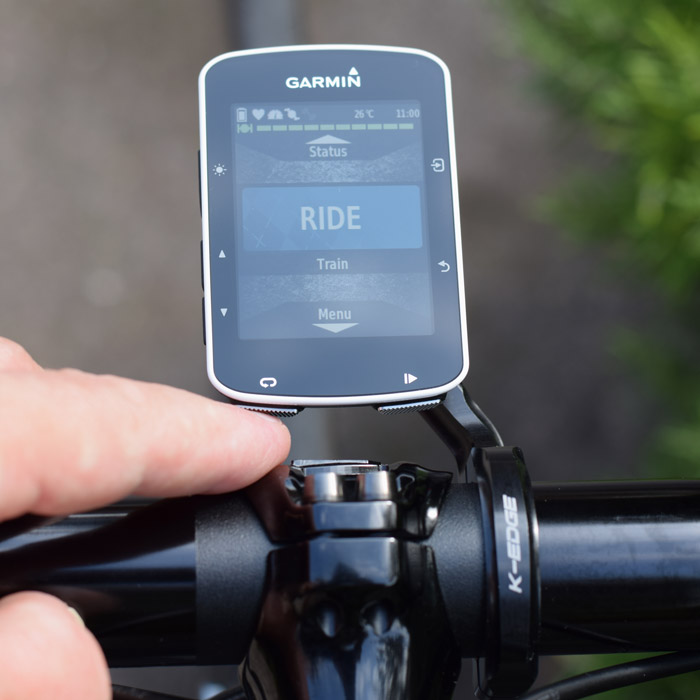

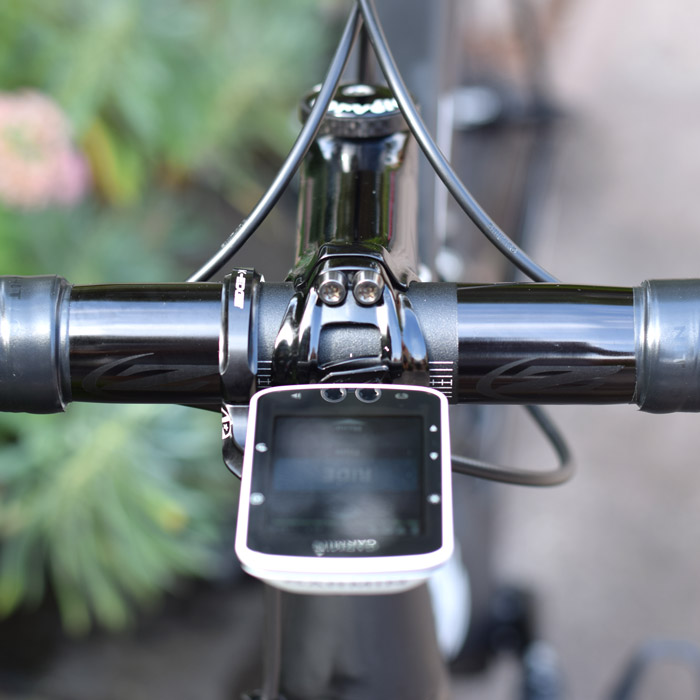
Now you are ready to put the Garmin Edge 520 on your bike and ride. I didn’t use the Garmin mounts in the box as I already had a K-Edge aero mount on my bike, the Edge 520 is smaller than the Edge 510 so it sits a bit further away from the handlebars. The start and lap buttons are on the bottom edge and there is more than enough room to press them when mounted with the K-Edge mount.
To start a ride simply turn the Edge 520 on and it will find your GPS location, pair to your phone and find the sensors you have previously paired, if you didn’t have your heart rate strap on at the previous step of connecting sensors then just press the Right Upper button, then again to select Status Page and scroll down to Sensors Connected using Left Lower button then through the options to add Heart Rate.
Then press the Bottom Right button to start and stop rides and the Bottom Left button for laps.
Maps for the Edge 520
One of the ride screens you will want to use is the map screen, the Garmin Edge 520 comes loaded with maps but the detail is minimal and not really usable. I downloaded the third party Openstreet maps and rather than go through all the detail here it’s easiest to go to DC Rainmaker and follow his instructions, it takes about 5 minutes and well worth it.
Unlike the Edge 800, 810 and 1000 there is no Micro SD card for the Edge 520 so storage is limited, you will need to keep map sizes slim.
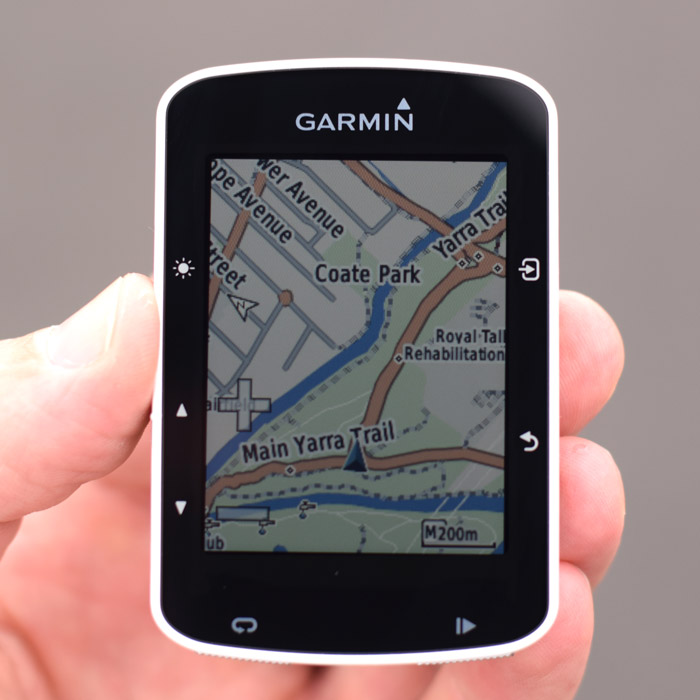
Once downloaded your map screens will look like these two shots below, to remove the “Ready to Navigate” message on the Garmin Edge 520 the instructions are below the two photos.
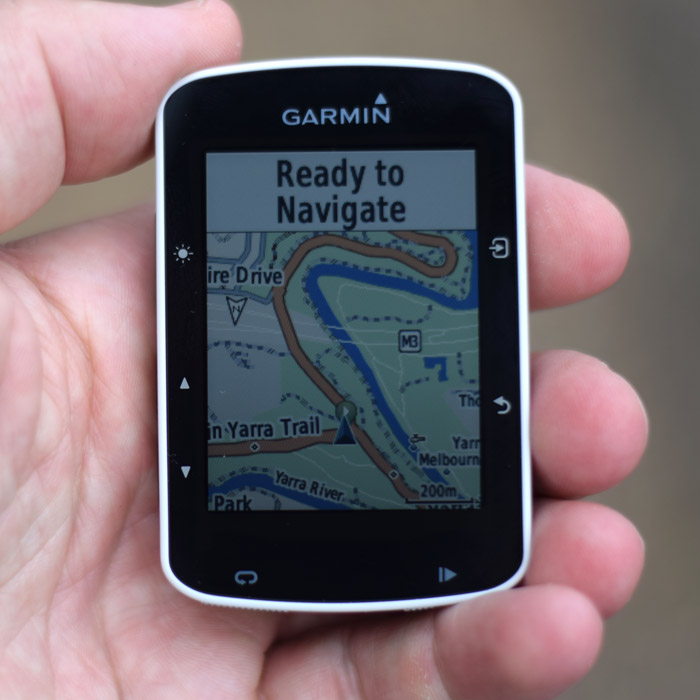
To remove the message “Ready to Navigate” on the Garmin Edge 520 follow these instructions.
From Main Menu > select Settings > select Activity Profiles > select the profile you want it removed from > scroll to Map > select Guide Text > then if you select Never Display it will not display “Ready to Navigate” on your ride map page.
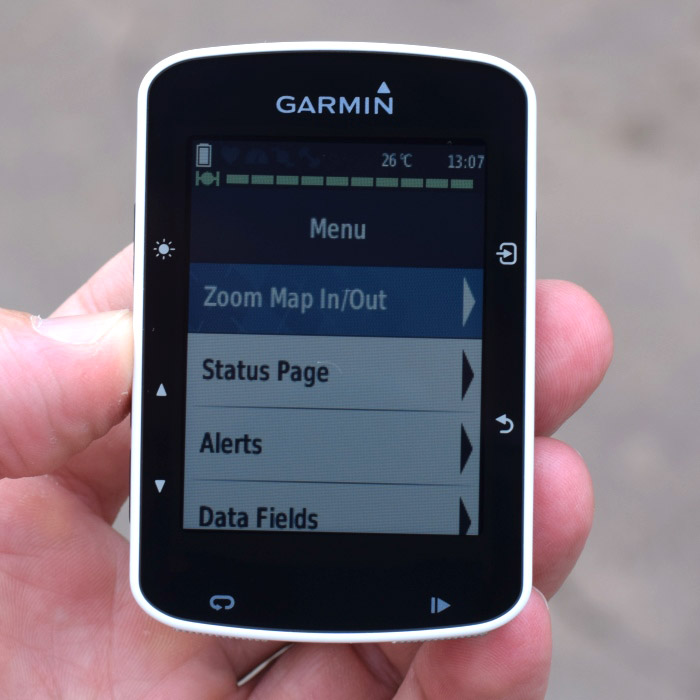
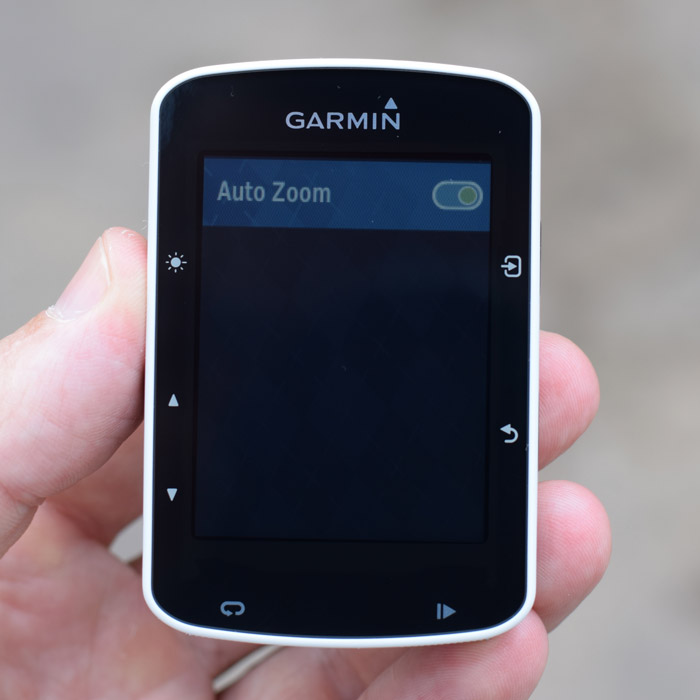
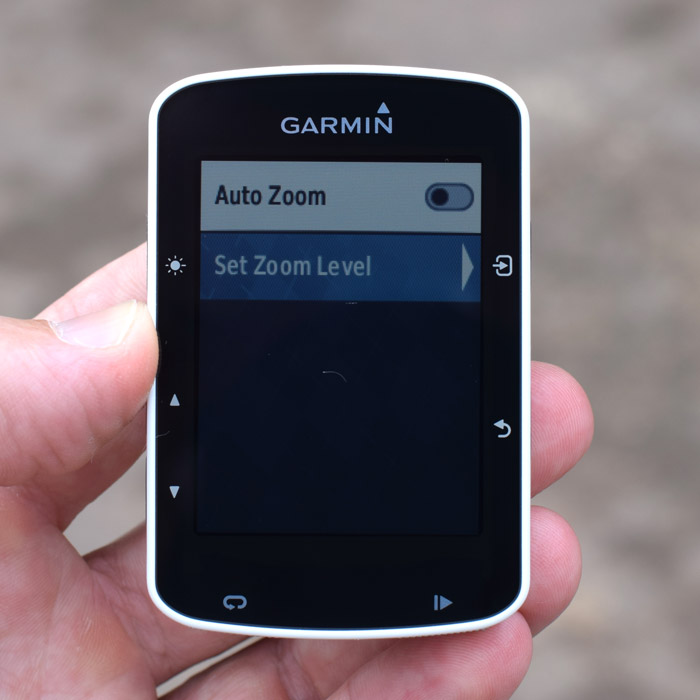
You can either leave the map set to the default Auto Zoom or you can go through the menus pictured below to turn off auto and with the Left Middle and Left Lower buttons set the zoom in or out you prefer (click photos to zoom).
Strava Live Segments
One of the new features rolled out on the Garmin Edge 520 was integration with Strava Live Segments, something that will appeal to the segment hunters with a Strava premium account. Basically you can have live segment data and the ability to race your previous times and leaderboard times. You will get status updates on approaching segments and your comparison on the segment.
The Strava Live Segments feature was also rolled out to the Edge 510, Edge 810 and Edge 1000.
You can turn these notifications off and disable the feature, and that’s exactly what I have done.
Ant+ Trainer Control
One of the new features of the Edge 520 is the ability to control electronic indoor trainers like the Wahoo Kickr, Wahoo Kickr Snap or Tacx NEO Smart turbo trainer directly from the Edge 520. You can set the resistance of trainers that support the ANT+ FE-C standard.
I’m using a Lemond Revolution with the Lemond Wattbox at the moment and that can’t be ergo controlled like the KICKR or Tacx Neo.
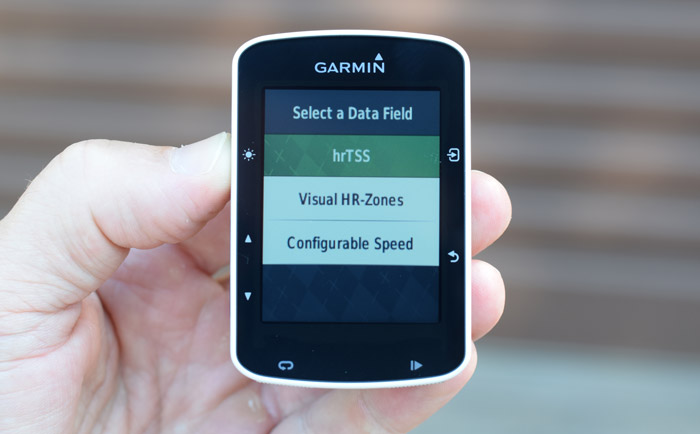
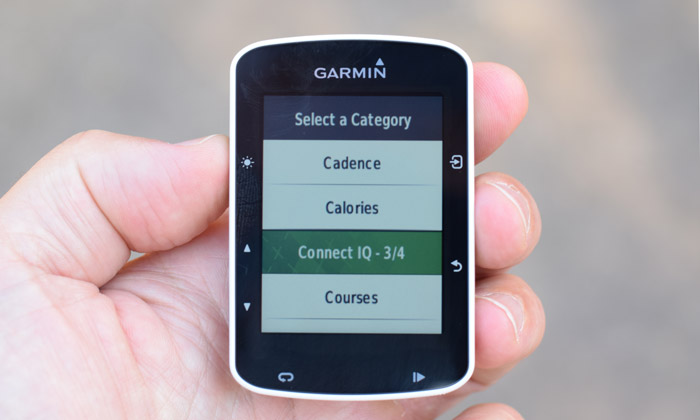
Garmin Connect IQ Data Fields
Within hours of this review being published Garmin announced that the long awaited Connect IQ data fields were being enabled for Garmin Edge 520 and Garmin Edge 1000 devices. What this means is that right now you have a number of third party data field ‘apps’ including heart rate, power, pacing that you can download via Garmin Express to your Edge device. Further down the track widgets and actual applications will also be enabled bringing a lot more functionality.
Rather than add a large section here about Connect IQ data fields take a look at this how to guide to set up Connect IQ data fields on your Edge.

Garmin Edge 520 Features and Comparison
The feature list for the Garmin Edge 520 is extensive and would take me a week to write and review them all here so I will keep this section mainly to the actual specs as listed by Garmin and a table comparing the Edge 520 to the Edge 810 and Edge 1000. There are a lot of other features below the table.
Comparison of the Garmin Edge 520 to the Edge 810 and edge 1000
| GARMIN GPS COMPUTER COMPARISON | Garmin Edge 520 | Garmin Edge 810 | Garmin Edge 1000 |
|---|---|---|---|
| Physical and Performance | |||
| Physical dimensions | 49 x 73 x 21 mm | 51 x 93 x 25 mm | 58 x 112 x 20 mm |
| Display size, WxH | 35 x 47 mm | 36 x 55 mm | 39 x 65 mm |
| Display resolution, WxH | 200 x 265 pixels | 160 x 240 pixels | 240 x 400 pixels |
| Touchscreen | No | Yes | Yes |
| Color display | Yes | Yes | Yes |
| Weight | 60 grams | 98 grams | 114.5 grams |
| Battery | USB Rechargeable | rechargeable lithium-ion | USB Rechargeable |
| Battery life | up to 15 hours | up to 17 hours | up to 15 hours |
| Water rating | IPX7 | IPX7 | IPX7 |
| GPS-enabled | Yes | Yes | Yes |
| GLONASS | Yes | No | Yes |
| Backlit Display | Yes | Yes | Yes |
| FEATURES | |||
| ANT+ External Sensors | Yes | Yes | Yes |
| Bluetooth Smart External Sensors | No | No | No |
| Power Meter Capable | Yes | Yes | Yes |
| Recording Interval | 1 Second | 1 Second | 1 Second |
| Wireless Connection | No | Yes | Yes |
| Smart Notifications | Yes | No | Yes |
| Customizable Screen | Yes | Yes | Yes |
| Display GPS & Sensor Data | Yes | Yes | Yes |
| Control Music Playback | No | No | No |
| Mount | 1/4 Turn (Garmin) | 1/4 Turn (Garmin) | 1/4 Turn (Garmin) |
| Replaceable Battery | No | No | No |
| Shock Proof | Yes | Yes | Yes |
| Altimeter | Yes | Yes | Yes |
| Trainer Smart Control | Yes | No | Yes |
| Live Tracking | Yes | Yes | Yes |
| Electronic Gear Shift Display | Yes | Yes | Yes |
| Visual Maps | Yes | Yes | Yes |
| Temperature | Yes | Yes | Yes |
| Strava Live Segments | Yes | Yes | Yes |
| Automatic sync | Yes | Yes | Yes |
| Accepts data cards | No | Yes | Yes |
Other features
Compatible with Varia™ bike radar and lights.
Edge® remote compatibility.
LiveTrack.
Advanced performance analysis, VO2, Time in Zone, FTP, recovery and cycling dynamics.
Bike trainer profiles and control.
Weather alerts.
Garmin Virb control.
For further details and explanation of all features you can visit the Garmin Edge 520 page at Garmin.com and you can also download the Garmin Edge 520 manual here to view all instructions and specifications.
Garmin Edge 520 Review Summary
The Garmin Edge 520 is an advanced bike GPS computer and well worth the upgrade if you already have an Edge 510 or Edge 500, or as your first GPS cycling computer if you haven’t used one before.
I liked the new button layout and the fact that there is no longer a touch screen, I liked the bigger effective screen compared to the Edge 510 and although I’m not a Strava live segment fan this is probably going to be one of the major appeal factors for a lot of users, the trainer control is something I’m going to use a lot in the future. The mapping with Openstreet maps is also a nice feature coming from an Edge 510.
There wasn’t really anything that I didn’t like about the Edge 520 but some users will have a problem with the bottom two buttons and their position if you have an existing out front mount where space to the handlebar may be limited, default maps are bad but just change them to Openstreet and some users will think losing the touchscreen is a backward step.
In all the Garmin Edge 520 is an impressive GPS bike computer and I would definitely recommend buying one.
As mentioned further up the article I bought my own unit for this review, I bought it online from Pushys and received no additional discount than any other buyer would. It’s worth mentioning that the online service from Pushy’s was first class, user friendly with great email order acknowledgement and delivery estimation. I had the Garmin within two days of purchase.


Nice review. Does the Lemond Wattbox show you cadence and speed as well as the power on your Edge 520?
Hi Paul, the Lemond Wattbox will send power and speed data to your Edge 520 and to get cadence just add a cadence sensor. I use the Garmin magnet-less cadence sensor on the crank. To pair the Wattbox add it as a power meter then pair it separately as a speed sensor and then it will display power and speed.
The k-edge mount in the photos, was that a 510 specific mount or was it for an 810/1000? Just want to check bottom button clearance.
It was for a 510/500 when I bought it, the 520 fits ok on it and finger clearance on the start/stop and lap buttons is enough. It’s pretty similar to the Bar Fly 4 mini in the review I did, the Barfly has maybe a little bit more room.